
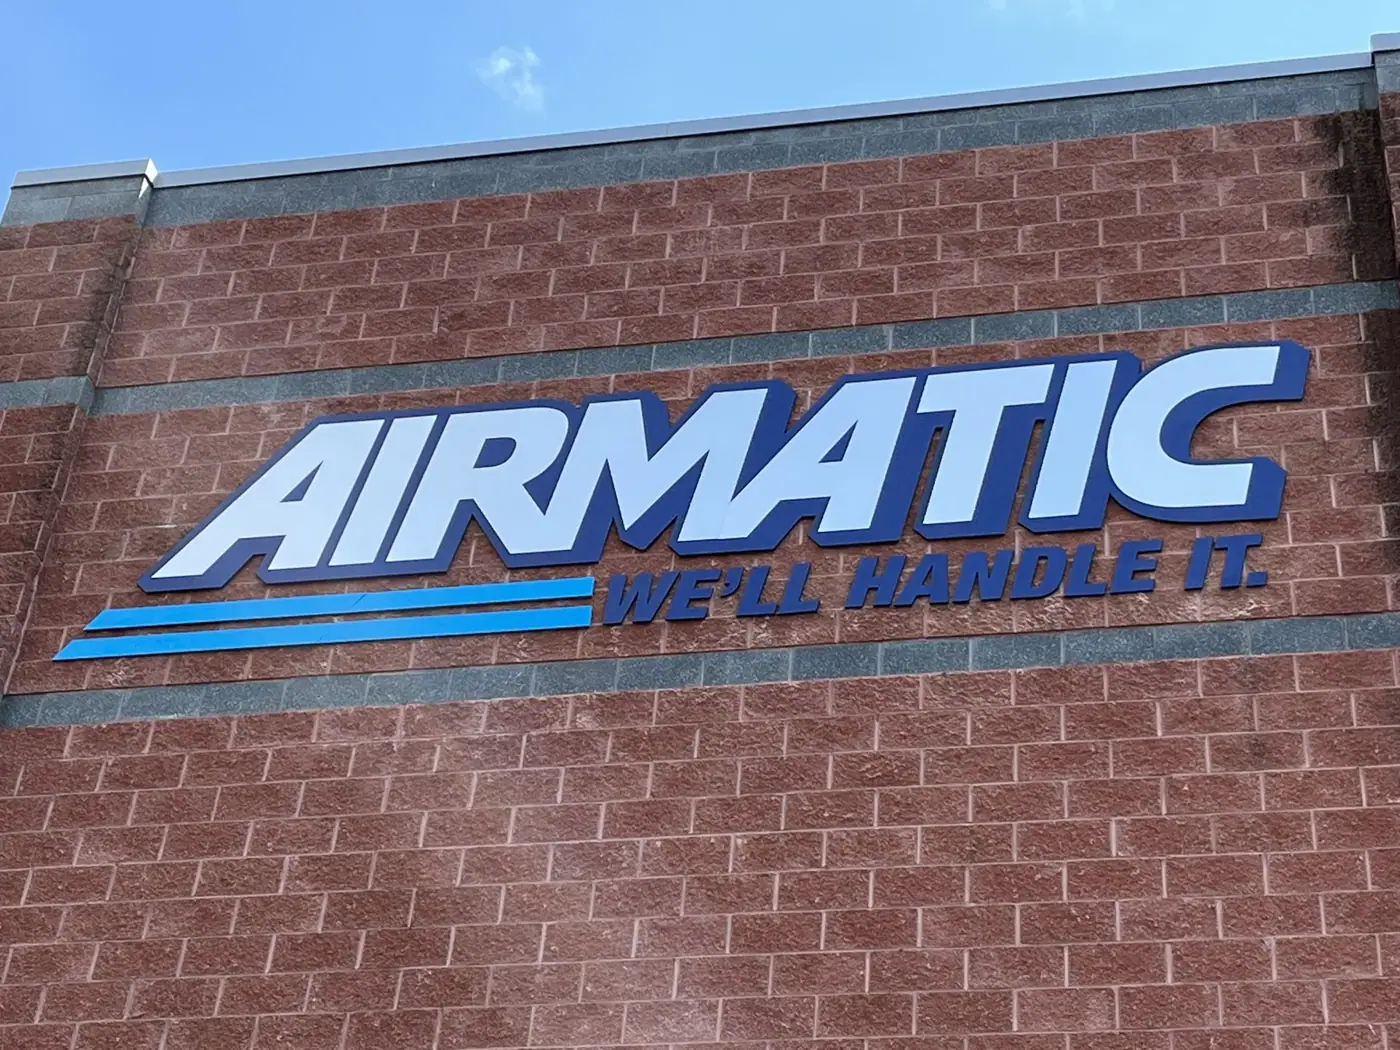
How Much Does a Channel Letter Sign Cost?
If you’re researching channel letter sign cost, you’ve probably noticed that prices vary dramatically. One company quotes $2,500 while another estimates $12,000 for what appears to be a similar sign.
The reason is simple: no two channel letter signs are exactly alike.
A channel letter sign is a custom-built product manufactured specifically for your building, your brand, your municipality, and your installation requirements. The size of each letter, lighting method, materials, mounting style, electrical work, engineering, permits, and installation complexity all influence the final investment.
For most businesses, a professionally manufactured and installed channel letter sign typically ranges from $2,000 to $20,000+, although smaller projects and large multi-tenant commercial installations can fall outside this range depending on specifications and complexity. Industry pricing guides commonly place many standard projects between roughly $2,000 and $5,000, while larger or more complex installations can exceed $20,000.
This guide explains exactly what drives channel letter sign pricing so you can budget confidently and compare proposals fairly.
What Are Channel Letter Signs?
Channel letters are three-dimensional individual letters, logos, or shapes mounted right onto the exterior of a commercial building.
Unlike flat panel signs, each letter is crafted on its own from aluminum, acrylic, LEDs, and other long-lasting materials. The result is a premium look that stands out beautifully, whether the sun is shining or the sky has gone dark.
You’ll often spot channel letters on:
- Retail stores
- Shopping centers
- Restaurants
- Medical offices
- Banks
- Hotels
- Corporate headquarters
- Industrial buildings
- Churches
- Schools
- Apartment communities
Because they’re built to order, channel letters give your business one of the most polished, professional appearances you can find for a commercial property.
Average Channel Letter Sign Cost
Although every project is unique, these ranges provide a useful starting point.
| Project Type | Typical Price Range |
|---|---|
| Small storefront | $2,000–$4,500 |
| Medium retail storefront | $4,500–$8,000 |
| Large commercial façade | $8,000–$15,000 |
| Large custom signs with logos | $15,000–$30,000+ |
These estimates generally include fabrication and installation but may not include permitting, engineering, electrical work, crane services, or landlord review requirements.
Instead of asking, “How much does a sign cost?” it’s more useful to ask:
What is included in the proposal?
Two quotes may differ by thousands of dollars simply because one includes permits, engineering, installation, electrical connections, and warranty while another does not.
What Determines Channel Letter Sign Cost?
A few different factors come together to shape the final price. Let’s walk through them so you know exactly what goes into your investment.
Sign Size
The single biggest factor is the overall size of your sign. Larger letters simply need more of everything: Aluminum, acrylic, LEDs, larger power supplies, more labor and larger installation equipment
A sign built with 12-inch letters costs quite a bit less than one using 36-inch illuminated letters. In the same way, a cozy 15-foot storefront generally costs less than a sweeping 40-foot retail façade.
Number of Letters
Every single letter is manufactured on its own, so the count really matters. More letters mean more fabrication, LED modules, wiring, and installation time. Here’s a quick example:
ABC Dental will cost less than West Chester Family Dentistry & Orthodontics, simply because there are more components to build for the longer name.
Logo Complexity
Logos often add to the total cost, and it all comes down to detail.
A simple geometric logo may only take a few fabrication steps. But a detailed logo with curves, multiple colors, push-through acrylic, or layered construction asks for a lot more hands-on work.
Corporate branding standards can raise the bar too, calling for exact paint matching, specialty finishes, and custom fabrication to get everything just right.
Letter Depth
Channel letters come in a range of depths, so you can pick the look that suits you best. Common depths include 3″, 4″, 5″ and 7″.
Deeper letters use a bit more material, but they reward you with a bolder, more dimensional appearance and stronger lighting performance.
Materials
The materials you choose have a direct effect on the durability, appearance, and price of your sign. Here are the most common options to consider.
Aluminum
Aluminum is the industry standard for good reason. It’s lightweight, which makes it easy to work with and install, and it’s naturally rust resistant, so it holds up beautifully against the elements. On top of that, it’s wonderfully durable, giving you a dependable foundation that lasts for years.
Acrylic Faces
Acrylic faces are prized for their excellent light diffusion, spreading illumination evenly for a warm, inviting glow after dark. They come in a wide range of colors, so you can match your brand perfectly. They’re also UV resistant, which means they resist fading in the sun and enjoy a long, reliable lifespan.
Stainless Steel
Stainless steel is often chosen for premium architectural projects, and it’s easy to see why. It delivers a high-end, refined look that feels polished and elevated. It generally costs more than aluminum, but for the right space, that sophisticated appearance is truly worth the investment.
Specialty Finishes
If you want your sign to feel one of a kind, specialty finishes are a wonderful place to start. You can choose from brushed metal or polished metal for a distinctive touch, along with matte finishes, painted finishes, and powder coating for lasting protection. And if your brand has its own signature palette, custom brand colors let you bring it to life exactly as you imagine.
Types of Channel Letter Signs
The lighting style you choose does more than shape how your sign looks after dark. It also plays a big role in your overall cost. Let’s walk through the five main types so you can find the one that fits your space, your brand, and your budget.
Front-Lit Channel Letters
Front-lit channel letters are the most common commercial signs you’ll see, and for good reason. LED modules sit inside each letter and illuminate the acrylic face from within, giving you bright, even light that’s easy to read from a distance. You get excellent visibility, dependable illumination, and lower maintenance, all at a cost-effective price point. Because they blend strong performance with real value, front-lit letters are usually the best choice for most retail businesses.
Reverse-Lit (Halo-Lit) Channel Letters
Reverse-lit letters, often called halo-lit, take a more understated approach. Instead of lighting the face, the LEDs project light behind each letter and onto the building, creating a soft, glowing halo effect. You’ll often spot this elegant style on law firms, medical offices, corporate headquarters, luxury retail shops, and hotels. Since the fabrication is a bit more involved, halo-lit letters generally cost more than front-lit options, but the refined look they deliver is hard to beat.
Front and Reverse-Lit Combination Letters
If you want the best of both worlds, combination letters light up the face and the halo at the same time. These premium signs offer exceptional nighttime visibility, making a striking impression that’s tough to overlook. Keep in mind that all that impact calls for extra materials, additional electronics, and more detailed fabrication, so they sit at the higher end of the pricing range.
Open Face Channel Letters
Open face channel letters bring a fun, nostalgic character that’s perfect for restaurants, entertainment venues, breweries, and vintage-style businesses. Rather than covering the letters with an acrylic face, this style leaves the LED bulbs exposed for a bold, classic marquee look. That charming appearance comes with a few practical considerations, since the exposed design often involves additional fabrication and a little more ongoing maintenance.
Non-Illuminated Channel Letters
Not every channel letter sign needs to light up. Dimensional non-illuminated letters remain a popular pick for interior lobbies, monument signs, office entrances, historic districts, and budget-conscious projects. Because they skip the lighting components entirely, they usually cost less while still offering that polished, three-dimensional presence. It’s a smart way to make a professional statement without the extra electrical work.
Mounting Methods and Their Impact on Cost
How your sign attaches to your building shapes both its final look and the price of installation. Let’s walk through the three most common mounting methods so you can pick the one that fits your building, your style, and your budget.
Raceway Mount
Raceway mounting is the most common installation method, and it’s a favorite for good reason. Your letters attach to a painted aluminum raceway, which is a slim enclosure that neatly houses all the wiring, power supplies, and electrical components in one tidy place. Because everything lives inside that single unit, installation goes faster, maintenance is easier down the road, and your building takes far fewer wall penetrations. All of that adds up to lower labor costs, which is why raceway mounting is often the most economical solution for retail locations.
Flush Mount (Direct Mount)
Flush mounting, sometimes called direct mounting, gives your sign a cleaner, more seamless appearance. Here, each letter attaches directly to the building, and the wiring runs through individual holes drilled into the wall. Since there’s no visible raceway, the letters seem to float right on the façade, which is why this method is a favorite for upscale architecture and polished storefronts. Keep in mind that mounting every letter on its own takes more careful installation work, so flush mounting typically costs a bit more than a raceway setup.
Backer Panel Mount
Backer panel mounting offers a flexible, forward-thinking option. Your letters are attached to an aluminum or composite panel first, and then the whole panel is installed on the building as one piece. This approach really shines when a façade can’t handle extensive drilling, when multiple tenant changes are on the horizon, or when a building owner simply wants an easier way to swap signage in the future. It’s a smart, practical choice that keeps your options open for years to come.
Additional Costs to Consider
It’s easy to focus only on fabrication when you’re planning a new sign, since that’s the part you actually see going up on the wall. But fabrication is just one piece of the budget picture. A handful of other items can shape your total investment, and knowing about them early helps you plan with confidence and avoid surprises down the road.
Design
Great signs start with thoughtful design, and professional work often covers more than you might expect. Your designer may adapt your logo so it translates beautifully into three dimensions, prepare detailed shop drawings that guide the build, and create realistic renderings that let you see the finished look before anything is fabricated. Along the way, they’ll also keep everything in line with your brand standards, so the final result feels unmistakably yours.
Permits
Most municipalities ask for a permit before your sign can go up, and that step is an important part of doing things the right way. Permit costs vary quite a bit depending on where you’re located and how large your sign is, so it’s worth factoring in from the start. If you’d like a closer look at exactly what to expect, Part 2 of this guide walks through permitting requirements across Pennsylvania, Philadelphia, Chester County, Delaware County, Bucks County, and Montgomery County.
Engineering
Some projects call for sealed structural engineering drawings to make sure everything is safe and sound. This is especially true for larger signs, high-rise buildings, and multi-story installations, as well as buildings that face special wind-load requirements. It’s an extra step, but it gives you real peace of mind knowing your sign is engineered to hold up beautifully for the long haul.
Electrical Work
If there’s no electrical connection where your sign will hang, a licensed electrician may need to lend a hand before installation. That can mean installing new circuits, adding disconnect switches, running conduit, or even upgrading your electrical panels to handle the load. Because this work stands on its own, it’s frequently quoted separately from the sign itself, so it’s helpful to keep it in mind as you build out your budget.
Crane or Lift Equipment
When your sign is headed to a second story or a spot that’s tricky to reach, the installation crew may need some serious equipment to get the job done safely. That could include bucket trucks, boom lifts, or cranes, and in busier areas, a bit of traffic control too. These resources can add a meaningful amount to your installation costs, so it’s smart to talk through building access early with your sign company.
Removal of Existing Signs
If you’re replacing an older sign, there’s usually a little groundwork to handle first. That might involve removing the existing sign, repairing and painting the wall behind it, adjusting the electrical, and properly disposing of the old materials. It’s the kind of behind-the-scenes work that sets the stage for a fresh, clean install, and it’s well worth including in your plans from the beginning.
How to Budget for a Channel Letter Sign
When you’re planning a new sign, it’s tempting to hunt for the lowest price. But the smarter move is to focus on the total value of the whole project. Your sign is often one of the very first things customers notice as they walk up to your business, so it’s an investment that quietly works for you every single day.
As you shape your budget, it helps to look at the full picture rather than a single line item. Think through the design that gets everything started, the fabrication that brings your letters to life, and the installation that puts them proudly on your building.
From there, factor in permits, engineering if your project calls for it, and any electrical work needed to power your sign. Don’t forget the practical pieces either, like removing an existing sign, keeping the layout accessible for future maintenance, and understanding what your warranty covers. When you account for each of these together, you get a budget that reflects the real cost of a sign built to last.
It’s also wise to set aside a little cushion. A contingency of roughly 10% to 15% of your project budget gives you room to handle the unexpected with ease. That might mean an electrical upgrade, a façade repair, or an extra municipal review requirement that surfaces along the way. Having that reserve ready means a small surprise stays small, and your project keeps moving forward smoothly.
Choosing the Right Sign for Your Budget
Working within a specific budget doesn’t mean settling for less. More often than not, there are thoughtful ways to trim costs while keeping the quality and polish your brand deserves.
For instance, choosing raceway mounting instead of flush mounting can lower your installation costs while still delivering a clean, professional look. Front-lit letters are another great value, offering bright, dependable illumination without the added expense of a combination-lit design.
You might also opt for a simpler logo with fewer fabrication steps, lean on standard finishes rather than specialty coatings, and fine-tune your letter sizing so it stays budget-friendly while still meeting the visibility your storefront needs.
The good news is you don’t have to make these calls alone. An experienced sign company can recommend smart design adjustments that keep costs in check, protect your brand’s professional appearance, and make sure everything stays in line with your local regulations. With the right partner guiding you, you get a sign you’re proud of at a price that feels right.
Do You Need a Permit for a Channel Letter Sign?
In nearly every municipality, yes.
Most exterior commercial signs require a permit before installation, especially if they are:
- Illuminated
- Permanently attached to a building
- Connected to electrical service
- Larger than local zoning thresholds
- Installed on a new commercial building
- Replacing an existing sign with different dimensions
Some municipalities may allow replacement signs of the exact same size without a full zoning review, while others require new permits regardless of whether the sign replaces an existing one.
A reputable sign company should help determine which permits apply before manufacturing begins.
Why Permits Matter
Do You Need a Permit for a Channel Letter Sign?
In nearly every municipality, the answer is yes. Most exterior commercial signs need a permit before they can go up, and that’s especially true in a few common situations. If your sign is illuminated, permanently attached to your building, or connected to electrical service, a permit is almost always part of the process.
The same goes for signs that run larger than your local zoning thresholds, signs installed on a brand-new commercial building, or signs that replace an existing one with different dimensions.
There is a little room for variation here. Some municipalities will let you swap in a replacement sign of the exact same size without a full zoning review, which can make an update wonderfully simple.
Others, though, require a fresh permit no matter what, even if your new sign is stepping right into the spot the old one left behind. Because the rules differ so much from place to place, a reputable sign company should help you figure out exactly which permits apply before manufacturing ever begins. That early guidance keeps your whole project on solid footing from day one.
Why Permits Matter
Permitting isn’t just red tape. It’s there to protect both you as the property owner and the public who passes by your business every day. When local governments review commercial signs, they’re checking that everything measures up on the things that truly count, like public safety, structural integrity, and electrical safety.
They also look at how the sign fits the building’s appearance, whether it honors historic preservation standards, how it affects traffic visibility, and whether it stays within zoning compliance. Each of those checks helps your sign live safely and beautifully in its surroundings.
Skipping this step can turn into a costly headache fast. Installing a sign without approval can lead to stop-work orders, daily fines, and even mandatory sign removal. It can also delay your business opening, cause failed inspections, and pile on additional engineering expenses you never planned for.
That’s a lot of stress and expense for a shortcut that rarely pays off. Securing your approvals before fabrication is almost always far less expensive than fixing a non-compliant installation after the fact, so a little patience up front saves you real money and worry down the road.
Typical Sign Permit Process
Every municipality does things a little differently, but the good news is that most sign projects follow a similar path from start to finish. Once you know what to expect at each stage, the whole process feels far less intimidating. Let’s walk through it together, one step at a time.
Step 1: Site Survey
Everything begins with a visit to your property. Your sign company will stop by to get a real feel for the space and document the details that shape your project. They’ll measure your building dimensions, check the existing electrical service, and take a close look at the surfaces where your letters will mount. They’ll also study how your sign will be seen from the street, note any landlord requirements that apply, and photograph any existing signage that’s already in place. Think of this as the foundation for everything that follows, gathering the facts that keep your project accurate and on track.
Step 2: Design & Shop Drawings
With those measurements in hand, your project moves into the design stage, where your sign truly starts to take shape on paper. Professional shop drawings map out the overall dimensions and letter sizes, along with the colors and illumination type that bring your brand to life. They also spell out the mounting method, the electrical specifications, and the structural details that make sure everything is built to last. These drawings aren’t just for planning either. They’re often a required part of your permit application, so having them done well sets you up for a smoother approval down the line.
Step 3: Landlord Approval
If your business sits in a shopping center or a commercial office park, there’s usually one more approval to gather before anything goes to the municipality. Property managers like to review the plans first, and they often look at your brand colors, letter height, and how bright your illumination will be. They may also consider raceway visibility, any corporate standards that apply, and the tenant criteria written into your lease. It’s worth planning ahead here, since landlord approval can add anywhere from one to several weeks to your overall timeline. A little patience at this stage keeps everyone on the same page.
Step 4: Municipal Permit Review
Next, your application heads to the municipality for official review, and this is where the local experts weigh in. Depending on your jurisdiction, your plans might pass across several desks, including Zoning, the Building Department, and Code Enforcement. You may also hear from the Planning Department, the Historic Commission, or an Electrical Inspector, each checking that your sign fits neatly within the rules. Timelines vary quite a bit from one place to the next. Some municipalities turn reviews around in just a few business days, while others take several weeks, so it helps to build a little flexibility into your schedule.
Step 5: Fabrication
Once your permits are approved, the exciting part begins: building your sign. Skilled fabricators bring your drawings to life through a series of careful steps, starting with CNC cutting and aluminum forming to create each letter’s shape. From there, the pieces are welded and painted, then fitted with LED installation to give your sign its glow. Before anything leaves the shop, it goes through electrical testing and factory quality control, so you can trust that every detail has been checked and double-checked. This is where all that earlier planning pays off in a sign that’s built beautifully and made to perform.
Step 6: Installation & Inspection
Finally, your sign makes its way to your building and goes up right where it belongs. In many jurisdictions, there’s one last step after installation: a final inspection to confirm everything matches your approved permit. It’s a reassuring way to wrap things up, giving you the confidence that your sign is safe, compliant, and ready to welcome customers for years to come.
Pennsylvania Building Code Considerations
Pennsylvania municipalities generally adopt their own versions of the International Building Code (IBC), the International Existing Building Code (IEBC), and the National Electrical Code (NEC). Keep in mind that local amendments can apply too, so the exact rules may shift a little depending on where your business sits.
When it comes to channel letter signs, building officials tend to look closely at a handful of key details. They’ll review how your sign attaches to the structure and how well it stands up to wind-load pressure, along with the overall integrity of the building wall behind it. On the electrical side, they check the disconnects, the conduit installation, and the grounding, and they make sure the electrical components stay easy to access. Fire safety clearances round out the list. The specific requirements vary from one municipality to the next and from one building type to another, so it always helps to confirm the local expectations early.
Structural Engineering Requirements
Not every sign needs a full engineering review, which is welcome news for smaller, simpler projects. That said, engineering is commonly required once a project grows more complex. You’ll often need it for large channel letter signs, multi-story buildings, and high-wind locations, as well as roof-mounted signs and heavy raceways. Unusual mounting conditions can call for it too, along with masonry or older buildings and any project that requires structural calculations to prove it’s safe.
When engineering is part of the picture, the drawings usually spell out quite a bit. They’ll include wind-load calculations and fastener specifications, along with the structural framing and wall attachment details that hold everything securely in place. Material certifications are often included as well. A licensed Pennsylvania professional engineer typically prepares and seals these documents when they’re required, giving you the confidence that your sign is built to code and made to last.
Electrical Requirements
Because illuminated channel letters tie into your building’s electrical system, most installations need to comply with the National Electrical Code. That compliance keeps your sign safe, dependable, and ready to shine for years.
Typical electrical work covers several pieces working together. You’ll usually see a dedicated electrical circuit and a disconnect switch, along with the power supplies and conduit that carry everything where it needs to go. Weatherproof connections protect against the elements, LED transformers power the glow, and proper grounding keeps the whole system safe. Depending on your municipality, this work may also call for separate electrical permits, a licensed electrician, and electrical inspections along the way. One important thing to plan for: if electrical service isn’t already available near your sign location, the extra work to bring it there can add a meaningful amount to your project costs.
Historic District Requirements
Historic districts often come with additional review standards, all designed to preserve the architectural character that makes those neighborhoods so special. If your business sits within a designated historic district, you may need approval before any permits can be issued.
Historic review boards look at the details with a careful eye. They frequently evaluate your sign’s size, materials, and colors, along with its illumination style, mounting methods, and letter depth. They also consider how visible the sign will be and how well it fits with the surrounding architecture. Some districts discourage or even prohibit internally illuminated signs, while others prefer reverse-lit or externally illuminated alternatives that feel gentler on a historic streetscape. Since historic approvals can take longer than standard permits, it’s wise to build a little extra time into your project schedule so the review never feels rushed.
Philadelphia Sign Permits
Philadelphia runs one of the most comprehensive permitting processes in the region, so a bit of planning goes a long way here. Your project may pass through several sets of hands, including the Department of Licenses and Inspections (L&I) and, when applicable, the Planning Commission. For designated properties, the Historical Commission weighs in as well, and you’ll also want sign-off from the property owner or landlord and the electrical inspectors.
Depending on your building, you may need a few different approvals stacked together. That can include a sign permit, an electrical permit, and a structural review, plus historic approval for the right properties. If lifts or sidewalks come into play during installation, you may also need Streets Department coordination. Downtown properties and historic neighborhoods often require extra coordination, so if you’re planning a new storefront, it’s smart to begin the permitting process as early as you possibly can.
Chester County Sign Requirements
Here’s a helpful detail to know up front: Chester County itself doesn’t issue sign permits. Instead, each municipality administers its own zoning and building regulations, which means the rules can look quite different from town to town.
Communities such as West Chester, Downingtown, Exton, Kennett Square, Phoenixville, and Malvern may each set their own expectations. Those can involve the maximum sign area, letter height, and illumination, along with setbacks, raceway visibility, and the number of signs permitted on a property. If your business sits within a historic district, particularly in downtown West Chester or Kennett Square, you may also need to pass an additional architectural review. Checking your specific municipality’s rules early keeps everything moving smoothly.
Delaware County Requirements
Municipalities throughout Delaware County generally regulate the same core elements, though the specifics can vary by town. You can expect them to look at the maximum sign size, the number of wall signs allowed, and the illumination, along with electrical permits and the methods used to attach the sign to your building.
Communities including Media, Springfield, Upper Darby, Ridley, Haverford, and Marple may each follow their own review process, so it’s worth confirming the details where your business is located. One thing to keep in mind: older commercial buildings sometimes require additional engineering because of existing wall conditions, which is simply part of making sure your sign hangs safely on an older structure.
Bucks County Requirements
Bucks County is home to many charming historic downtowns, and because of that, sign approvals here may involve extra architectural review. Communities such as Doylestown, Newtown, Bristol, Yardley, and Quakertown work to balance modern branding with thoughtful preservation goals, so your sign can look current while still honoring the character of the area.
Before you move forward, it’s a good idea to verify a few things. Take a close look at any historic district restrictions, the illumination allowances, and the maximum projection permitted, along with color requirements and mounting standards. Historic business districts generally need longer review periods than suburban retail centers, so a little patience and early planning will serve you well.
Montgomery County Requirements
Municipalities throughout Montgomery County frequently review a familiar set of details. They’ll look at your sign dimensions and wall coverage, the LED brightness, and the raceway design, along with the electrical work and any engineering your project requires.
Communities including King of Prussia, Norristown, Lansdale, Plymouth Meeting, Blue Bell, and Lower Merion may add one more step for shopping centers, often requiring landlord approval before the municipal review even begins. On top of that, large retail developments frequently have their own property management design standards that go beyond the local building codes. Knowing about these extra layers ahead of time helps you plan a timeline that stays realistic and stress-free.
Typical Project Timeline
Every project differs, but most channel letter sign installations follow a similar schedule.
| Phase | Typical Duration |
|---|---|
| Site survey & measurements | 1–3 days |
| Design & shop drawings | 3–10 business days |
| Landlord approval | 1–3 weeks |
| Permit review | 1–6 weeks |
| Engineering (if required) | 1–3 weeks |
| Fabrication | 2–5 weeks |
| Installation | 1–3 days |
| Final inspection | Varies by municipality |
Complex projects involving historic districts, engineered drawings, or multiple reviewing agencies may require additional time.
How Signs A La Carte Simplifies the Process
For many businesses, permitting and compliance are more intimidating than choosing the sign itself.
An experienced sign partner can help coordinate:
- Site surveys
- Code compliance
- Permit documentation
- Shop drawings
- Engineering coordination
- Landlord submissions
- Municipal communication
- Professional installation
- Final inspections
Managing these steps under one roof reduces delays, minimizes redesigns, and helps ensure the finished sign complies with applicable local requirements.
Planning Ahead Saves Time and Money
One of the biggest mistakes business owners make is waiting until just before opening to order a channel letter sign.
Permitting, engineering, fabrication, and installation all take time, especially in municipalities with historic review boards or complex zoning requirements.
Starting the process early allows time for approvals, avoids rushed decisions, and helps ensure your storefront is ready when your business opens.
In Part 3, we’ll explore how to compare sign proposals, build an accurate budget, avoid common purchasing mistakes, understand long-term maintenance costs, and answer the most frequently asked questions about channel letter signs.
Buyer’s Guide: How to Compare Channel Letter Sign Quotes
Here’s something worth knowing before you start comparing estimates: not every sign quote covers the same services. A lower number on paper can look appealing, but it may leave out important items that quietly raise your total cost later. That’s why it helps to look past the bottom line and dig into what’s actually included.
As you review each proposal, check whether it accounts for the full journey of your sign. That means asking if the quote covers the site survey and measurements up front, along with the custom design and shop drawings that shape your letters. Find out whether it includes permit applications, structural engineering if your project needs it, and any landlord approvals required for your location. From there, look for fabrication, LED lighting, installation, and the electrical connections that bring everything to life. Don’t forget the practical extras either, like crane or lift equipment for hard-to-reach spots, removal of your existing sign, final inspections, and warranty coverage. When you tally all of that up, a proposal that seems pricier at first glance may actually deliver far greater value, because it saves you from unexpected costs down the road.
Questions to Ask Before Choosing a Sign Company
Before you sign any contract, a few thoughtful questions can tell you a lot about who you’re working with. Here are the ones worth asking.
Are LEDs and power supplies covered by a warranty?
Lighting components do the heavy lifting on an illuminated sign, so you’ll want to know exactly which parts are protected and for how long. A clear answer here gives you real peace of mind.
Who obtains the permits?
Permitting can be one of the trickier parts of the process. Some companies fold permit management right into their service, while others leave it entirely up to you. It’s good to know which path you’re on before the paperwork begins.
Can you provide examples of similar projects?
Seeing completed installations is one of the best ways to gauge a company’s experience. Ask to view work that resembles yours, so you can picture how your own sign might turn out.
Will I receive a final proof before fabrication?
Always, always approve the final artwork, dimensions, colors, and spelling before anything goes into production. A quick review at this stage catches small details and makes sure the finished sign is exactly what you pictured.
Budgeting Examples
Every project is a little different, and the details you choose have a real effect on the final price. The examples below show how those choices play out across three very different businesses.
Example 1: Small Retail Store
Picture a boutique clothing store tucked into a neighborhood shopping center. This project features front-lit LED channel letters on a raceway mount, with 14-inch letters in standard colors, and it taps into the building’s existing electrical service. The estimated budget lands between $2,500 and $4,500. Projects like this one are among the most cost-effective you’ll find, mostly because the installation is straightforward and engineering is rarely required.
Example 2: Medical Office
Now consider a dental practice looking for a more refined look. This project calls for halo-lit channel letters on a flush mount, along with a custom logo, a building permit, and an electrical permit. The estimated budget runs from $6,000 to $10,000. The reverse-lit design and the direct mounting both add to the fabrication and installation work, which is what nudges the price higher than a simpler storefront sign.
Example 3: National Retail Tenant
Finally, imagine a national retail chain with big branding goals. This project includes a large illuminated logo, front and reverse-lit letters, and strict corporate branding requirements, along with structural engineering, shopping center approval, multiple inspections, and a crane installation. The estimated budget begins at $12,000 and can climb to $25,000 or more. Large corporate projects like this naturally involve more approvals, extra engineering, and specialized installation equipment, all of which shape that higher range.
Common Mistakes That Increase Channel Letter Sign Costs
A little know-how goes a long way when you’re planning a sign. Steering clear of a few common missteps can save you real time and money, so let’s walk through the ones that trip people up most often.
Choosing the Bid that Was “The Best Deal”
It’s tempting to jump on the lowest number you see, but the least expensive proposal often leaves out important pieces like engineering, permits, installation, or warranty coverage. Those gaps have a way of resurfacing later, usually as unexpected costs. Instead of focusing on price alone, compare the complete scope of each quote. When you weigh everything that’s included, the true value becomes much clearer.
Ordering Too Late
Here’s a surprise for many business owners: permitting and fabrication take longer than you’d expect. Ordering just a few weeks before your grand opening rarely leaves enough breathing room, and a tight timeline can turn into a stressful scramble. The fix is simple and reassuring. Start the process early, and you’ll give every step the time it needs to go smoothly, with your sign ready and shining when your doors open.
Ignoring Landlord Requirements
If your business sits in a shopping center, your landlord likely has design standards that shape your sign in real ways. Those standards can dictate letter size, colors, and illumination, along with mounting methods and where your logo can go. Manufacturing a sign before you have landlord approval is a gamble that can lead to costly redesigns. A quick check with your property manager up front keeps your project on track and your budget intact.
Forgetting Electrical Costs
Not every sign quote covers the electrical side of things, and that’s an easy detail to overlook. Depending on your location, you might need new electrical circuits, a licensed electrician, a panel upgrade, or disconnect switches to safely power your sign. Before you approve the project, confirm exactly what electrical work is included. A little clarity here means no surprises when the final bill arrives.
Choosing Appearance Over Visibility
A gorgeous sign is wonderful, but if drivers and passersby can’t read it from the street, it won’t do the job you’re counting on. Beauty and function should work hand in hand. Choose your letter size, contrast, and illumination with your actual viewing distance in mind, so your sign looks great and gets noticed from far enough away to bring people in.
Overlooking Future Maintenance
It’s easy to focus only on today’s price, but the years ahead matter too. Choosing high-quality materials and reliable LED components may cost a little more at the start, yet that upfront investment often pays you back by lowering repair expenses over the life of your sign. Think of it as buying peace of mind, since a sturdy, well-built sign keeps working beautifully with far fewer headaches down the road.
Maintaining Your Channel Letter Sign
One of the real joys of modern LED channel letters is how little upkeep they ask of you. Today’s LED components are built to run efficiently for years, so your sign can shine bright without demanding much attention. Still, a few routine inspections go a long way toward keeping it performing at its best and stretching its lifespan even further.
A good maintenance rhythm covers a handful of simple tasks. Plan to clean the sign faces once a year so they stay crisp and clear, and take a moment to check that your LEDs are still glowing at full brightness. It’s also smart to inspect the electrical connections and examine the mounting hardware, replacing any acrylic faces that have cracked or dulled along the way. Clearing debris from around the raceways helps everything stay tidy, and a quick test of your timers or photocells confirms your sign is lighting up right on schedule. The beauty of a simple annual inspection is that it catches small issues early, long before they have a chance to grow into expensive repairs.
When Should You Repair or Replace a Sign?
Not every hiccup means it’s time for a whole new sign. In fact, a straightforward repair is often all you need. When an individual LED fails, some wiring needs replacing, an acrylic face cracks, the paint begins to fade, or a power supply wears out, these are the kinds of everyday fixes that bring your sign right back to life without a major investment.
There are moments, though, when replacement is the wiser move. If your branding has changed and your sign no longer reflects who you are today, a fresh design makes far more sense than patching the old one. The same is true if your sign no longer meets code, the structural components have deteriorated, or replacement parts simply aren’t available anymore. And in some cases, newer LED technology can boost your energy efficiency so much that a replacement pays for itself over time. Whenever you’re unsure which path to take, an experienced sign company can walk you through the options and help you land on the choice that offers the best long-term value.
How Long Do Channel Letter Signs Last?
Here’s some reassuring news: a professionally manufactured channel letter sign can serve you faithfully for many years. Several factors shape just how long that lifespan stretches. The quality of the materials plays a big role, as does your local climate and how much direct sun the sign takes on day after day. The care that goes into installation matters too, along with the preventive maintenance you keep up and the quality of the LED components inside. When those pieces come together well, your sign is set up to last.
It’s worth knowing that the LED modules and power supplies may eventually need replacing, since they’re the working parts doing the heavy lifting. But the aluminum letter construction itself is remarkably durable and often stays in excellent condition for years and years. That’s a comforting thought, because it means the heart of your sign keeps standing strong while the smaller components can be refreshed as needed.
Why Quality Matters
Your storefront sign is often the very first interaction a customer has with your business, well before they ever step inside. That first impression carries real weight. A professionally designed and properly installed channel letter sign quietly communicates credibility and stability, along with a sense of professionalism that puts people at ease. It builds brand recognition and shows an attention to detail that customers genuinely notice, even if they can’t quite put their finger on why a place feels trustworthy.
Every project has a budget, and that’s completely understandable. But investing in quality materials, experienced fabrication, and professional installation tends to deliver the lowest total cost of ownership over the full life of your sign. Fewer repairs, longer performance, and a look that stays sharp year after year all add up. In the end, choosing quality isn’t just about how your sign looks on day one. It’s about the confidence and value it brings you for many years to come.
Frequently Asked Questions
How much does a channel letter sign cost?
Most professionally installed channel letter signs cost between $2,000 and $20,000+, depending on size, lighting, mounting method, engineering, permitting, and installation complexity.
What is the most affordable type of channel letter sign?
Front-lit LED channel letters mounted on a raceway are typically the most economical option while still providing excellent visibility and durability.
Are LED channel letters worth the investment?
Yes. LED illumination is energy-efficient, long-lasting, bright, and requires less maintenance than older lighting technologies.
How long does it take to install a channel letter sign?
Most projects take 4 to 10 weeks from design approval to installation, depending on permitting, engineering, fabrication, and scheduling. Complex projects or those in historic districts may take longer.
Does every sign require engineering?
No. Smaller storefront signs often do not. Larger, heavier, or unusually mounted signs may require structural calculations prepared by a licensed engineer.
Who is responsible for obtaining permits?
This varies by sign company. Many full-service sign companies prepare permit applications and coordinate approvals on behalf of their clients.
Can channel letter signs be installed on any building?
Most commercial buildings can accommodate channel letter signs, but the mounting method, wall construction, landlord requirements, and local codes determine the best installation approach.
What is the difference between raceway and flush mounting?
A raceway mount attaches all letters to a single metal enclosure that conceals wiring, making installation easier and reducing wall penetrations. Flush mounting installs each letter directly to the building for a cleaner architectural appearance but typically requires more labor.
How long do LED channel letters last?
High-quality LED systems often provide many years of reliable service. Individual components such as power supplies or LED modules may eventually require replacement, but the aluminum letter construction is designed for long-term durability.
Can I replace my existing sign with channel letters?
In most cases, yes. An experienced sign company can evaluate your existing sign location, electrical service, building structure, and local code requirements to determine the best replacement solution.
Invest in a Sign That Works as Hard as Your Business
Choosing a channel letter sign was never really about chasing the lowest price. It’s about finding a sign that truly reflects your brand, stays in step with your local regulations, and performs dependably year after year. When you look at the full value rather than a single number, you set yourself up for a result you’ll be proud of every single day.
That’s where all the planning pays off. When you understand the factors that shape channel letter sign cost, prepare for permitting and installation ahead of time, and partner with an experienced sign company you trust, you turn a big decision into a confident one. You’re making an informed investment, and that investment works quietly on your behalf, boosting your visibility and creating a strong first impression for everyone who passes by.
The best part is how well a channel letter sign fits your journey, wherever you are in it. Whether you’re opening a brand-new location, giving an existing storefront a fresh identity, or finally upgrading tired old signage, a professionally designed channel letter sign remains one of the most effective ways to lift your curb appeal, reinforce your brand, and draw customers through your doors. It’s a smart investment today, and one that keeps rewarding you for years to come.